
Advanced Page
Advanced Pages are similar to Basic Pages but have additional features. They are often used for more complicated pages such as homepages. The Advanced Page content type is only available for Site Owners. These pages allow you to add multiple page content sections which can include, rich text (or WYSIWYG) editors, heroes/slideshows, webforms, or GW Bulletin embeds.
| Feature | Basic Page | Advanced Page |
|---|---|---|
| Rich Text (WYSIWYG) Editor | ||
| Media Headers | ||
| Article and Event Feeds | ||
| Webforms | ||
| Image Backgrounds | ||
| Color Backgrounds | ||
| Hero Image/Slideshow | ||
| GW Bulletin Embeds |
These page content sections also have options for how they are styled.

Creating an Advanced Page
- Hover over Content > Add Content
- Click on Advanced Page
OR
- Use the Advanced Page icon in the Create Content section on the top of the Dashboard
A blank content entry page will load. Fill it in as necessary to create your Advanced Page.
*If you do not see the option to create an Advanced Page your user account may not have access.
Content Fields
- Title: required
- Be careful not to use the same title for multiple content items. By default, Drupal uses the content title to create a unique URL for all content items (including Supporting Content items).
- If multiple items share the same title, Drupal appends the default URL with "-x" where x is a sequential number (i.e. -0, -1, -2, etc...) to account for the duplication. This can be overridden but is often missed.
- Only uncheck Display Title box if you are displaying the title on the page image
- Summary: required; this should be a summary of the content in this page (no more than 160 characters), this can be displayed in page previews or search results
- Page Header Image: optional, use to set a featured image at the top of your page
- Page Image Alternative Text: required; describe the visuals in your image and provide any text on the image verbatim
- This will be read aloud to visitors using a screen reader and displayed on devices that cannot load the image. Check out the Accessibility page for more tips on making your website content accessible.
- Page Image Title: optional; text entered here displays in a tooltip popup if a desktop user hovers their mouse over the image
- Page Image Caption: optional; displays a caption beneath the image on the published page
- Page Image Alternative Text: required; describe the visuals in your image and provide any text on the image verbatim
- Use Left Menu Checkbox: optional but recommended unless when making landing pages
- Content Sections: add sections for multiple or different kinds of content including, rich text (or WYSIWYG) editors, heroes/slideshows, webforms, or GW Bulletin embeds
- Styling Settings: each content section may have styling options
- Real-time SEO analyzer: This can give you a preview of how your page may display in search results
- Add any Focus Keywords you think would used to search for this page
- Add any Focus Keywords you think would used to search for this page
Content Sections
Add a Rich Text (WYSIWYG) editor section with a title and body field. This section functions much like the rich text editor used in Basic Pages.

One or more images can be added as slides with custom styling settings.
- Use the +Add button to add a new section to the advanced Page and select Hero/Slideshow.
- Add a descriptive title to the content section (this is optional)
- Choose Style Settings for the Hero/Slideshow section
- In the Slide Content section, use the Add Hero Image/Slide button to add the first image
- In the Hero Image / Slide section, complete the appropriate Image Information fields such as Title, Description, and Link for each image
- Then use the Add Media button to select or upload an image
- This will open the Media Library, where you can select an existing image or upload a new one and use the Insert Selected button to add the image to the content section
- If uploading a new image, be sure to add descriptive alternative text provided to ensure that they are accessible for the web
- To add any additional images, use the Add Hero Image/Slide button to add the first image and repeat the same process

Screenshot of an Advanced Page Slideshow with three images
Add an existing webform to the page and customize styling settings.
- Use the +Add button to add a new section to the advanced Page and select webform
- Add a descriptive title to the content section (this is optional)
- Use the Webform dropdown to select the form you want to add.
- Review the Webform Settings section to make sure everything is correct.
Note: The webform must be created before it is added to an advanced page.

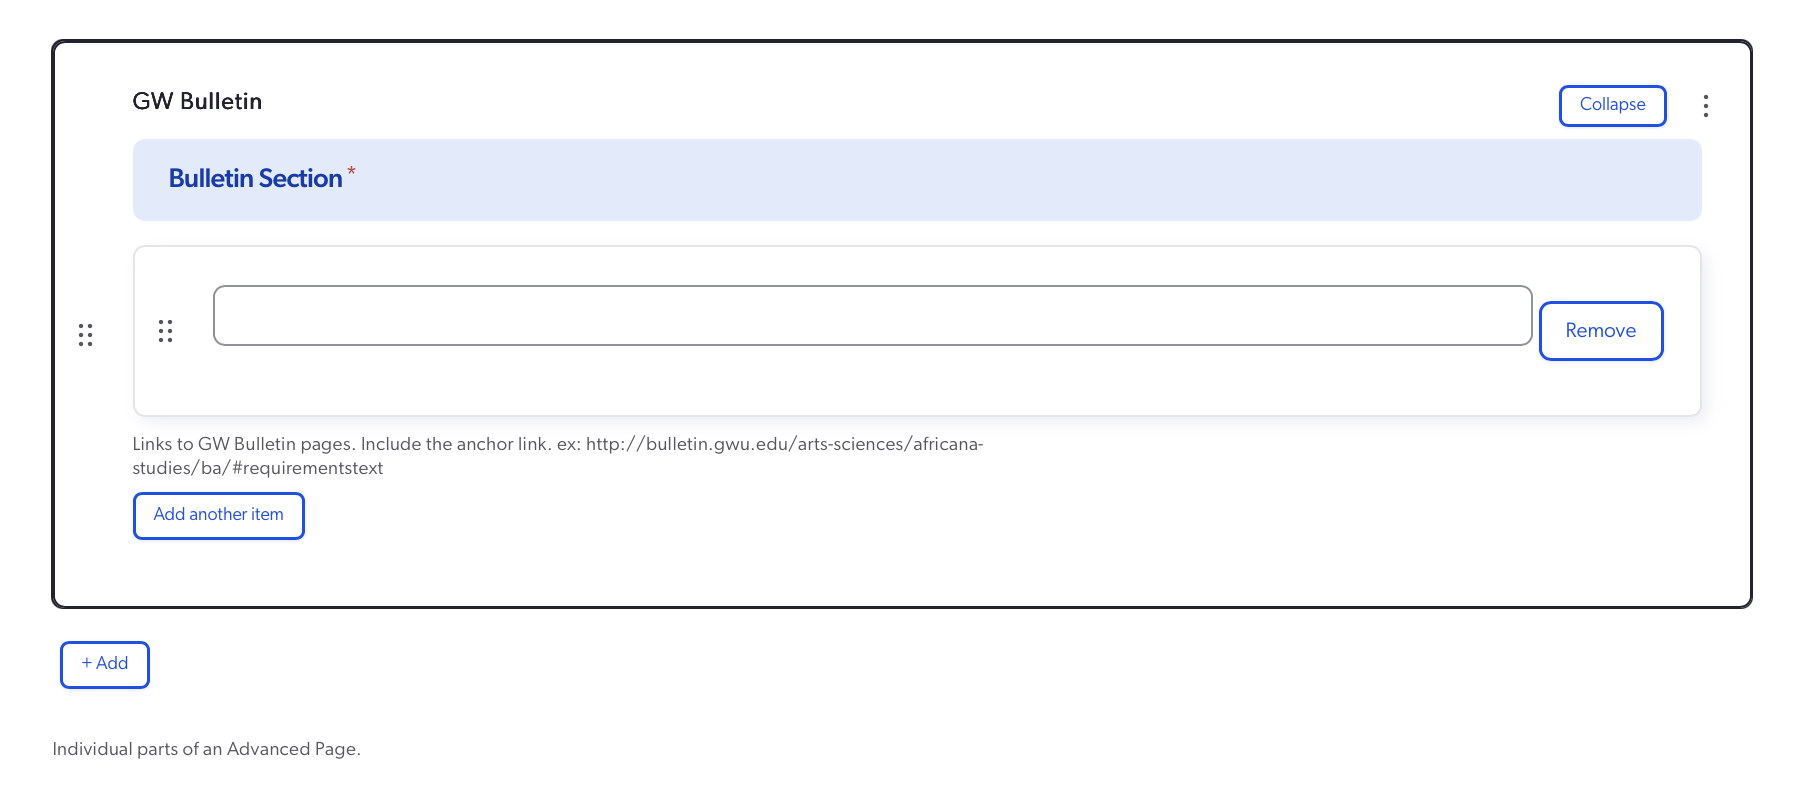
Add content from the GW Bulletin by pasting a URL from the bulletin website
- Use the +Add button to add a new section to the advanced Page and select GW Bulletin
- Add a descriptive title to the content section (this is optional)
- Paste a URL from the bulletin website in the Bulletin Section field
Hiding Content Sections
Each new content section is displayed by default, however individual Rich Text and Hero/Slideshow sections can be unpublished
- Use the Published toggle switch () at the bottom of each content section to publish or unpublish
Note: Hidden content will still be visible while you are logged in. Log out or open the page in a private browser window to check your updates.
Sidebar Panel Settings
- Revision Log Message: optional; leave a message associated with this version of the page
- Authoring Information: leave as is
- Meta Tags: use to provide page-specific metadata for search engine optimization
- Menu Settings: always check the "Provide a menu link" checkbox
- Delete the link text to maintain the breadcrumbs, but prevent a link from appearing in the navigation bar, dropdown or sidebar. Recommended for Article and Event pages; and, typically, for Person pages
- URL Alias: leave as is, unless you want or need to customize the page link
- Publishing States:
- Draft (default for new pages) is an unpublished page only accessible to logged in Drupal users
- Published pushes the page live to website visitors and is only accessible to a Content Owner or Site Owner
- Archived/Unpublished will unpublished and archive any existing pages
Once all fields are completed as necessary, click the Save button to commit your changes.