Image Sizes
Images can be used on most GW Drupal content types, but may display differently depending on where and how they are added to the page. To learn about embedding images using the Media Library, check out the Images & Media page.
Note: Image sizes, proportions, and cropping can't be manually adjusted in GW Drupal. You can choose how large an image is displayed on some content types, but this will not change the file size or proportions.
Alternative Text
All images should have descriptive alternative text provided to ensure that they are accessible for the web.
Image File Size
Image files are restricted to 2 MB or less. In order to keep your site optimized for speed and visibility, be sure to use the recommended sizes based on where the images are being added.
Inline & Template Images
- Horizontal - 1080x720 pixels
- Square - 1080x1080 pixels
- Vertical - 720x1080 pixels
Media Headers
Media Headers, sometimes referred to as "heroes" or "hero images", are images featured at the top of a webpage. They are often used to brand a homepage or landing page for a section of a site. There are three predetermined display sizes you can choose, and Drupal will automatically crop the banner, depending on your selection:
- Small 1600x270 pixels
- Medium 1600x400 pixels
- Large 1600x530 pixels
Selecting Original will display the banner at the image's native full height, and fill the width of the screen from edge-to-edge.
Note: Using the original size of an image could make some images take of up a lot of the page if they are tall. If this is the case, try using one of the size cropping options.
Setting Image Focus Area
Images will be cropped to different aspect ratios when they're displayed in feeds or directories. You can ensure they'll appear how you want them to be by setting an image focus area. This process lets you choose a point on the image that will be centered when it is cropped in a feed or directory. For example, choosing a person's face in a headshot as the focal area can help avoid having the top of someone's head being cut off by the automatic crop.
To set the focus area for an image follow these instructions:
- In the Media Library, find the image you would like to modify
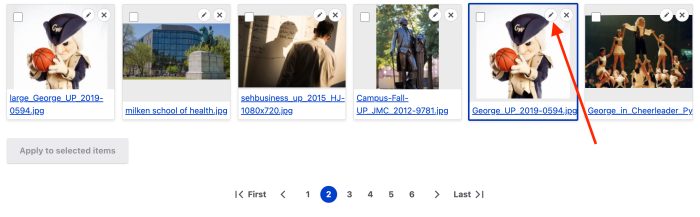
Click the pencil icon (
 ) on the top right corner of the image thumbnail to edit the image
Screenshot highlighting the edit icon on the image thumbnail
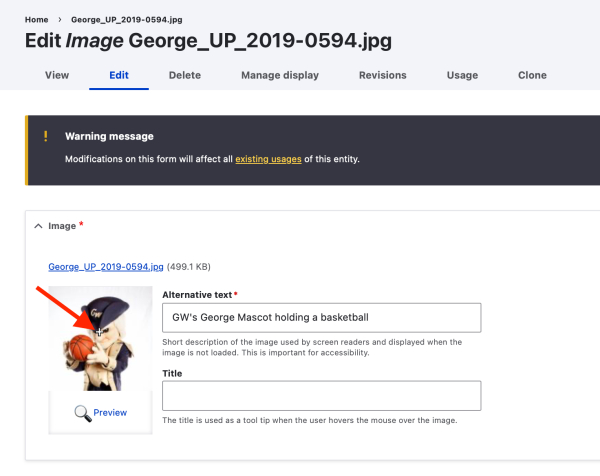
Drag the crosshair on the image thumbnail to set the image focus area

Screenshot highlighting the focus crosshair
Use the preview feature to see how the image will look based on different displays

Screenshot of the image display preview