Header
The Header of a GW Drupal website provides a space to present the university logo and/or to identify the site. It also has the option to provide a call-to-action button link. Headers are global content and are displayed on the top of every page. Like many other site wide elements, Headers can only be updated by Site Owners.
Headers act as the main identifier and don't need to be updated often; however, making any necessary changes is simple. They consist of an image uploader, a text field, and button link fields.
Updating a Header
By default, Headers will display the GW monogram logo and have a customizable text field that can be easily updated when necessary. For example, if the name of an organization changes you would want to update the header with the new name. Follow these instructions to update the header.
- Hover over Structure in the admin menu bar then click on Block Layout
- Note: If you do not see Block Layout under Structure in your menu, you do not have the permission level required to make this kind of update. Contact your site owner for further assistance.
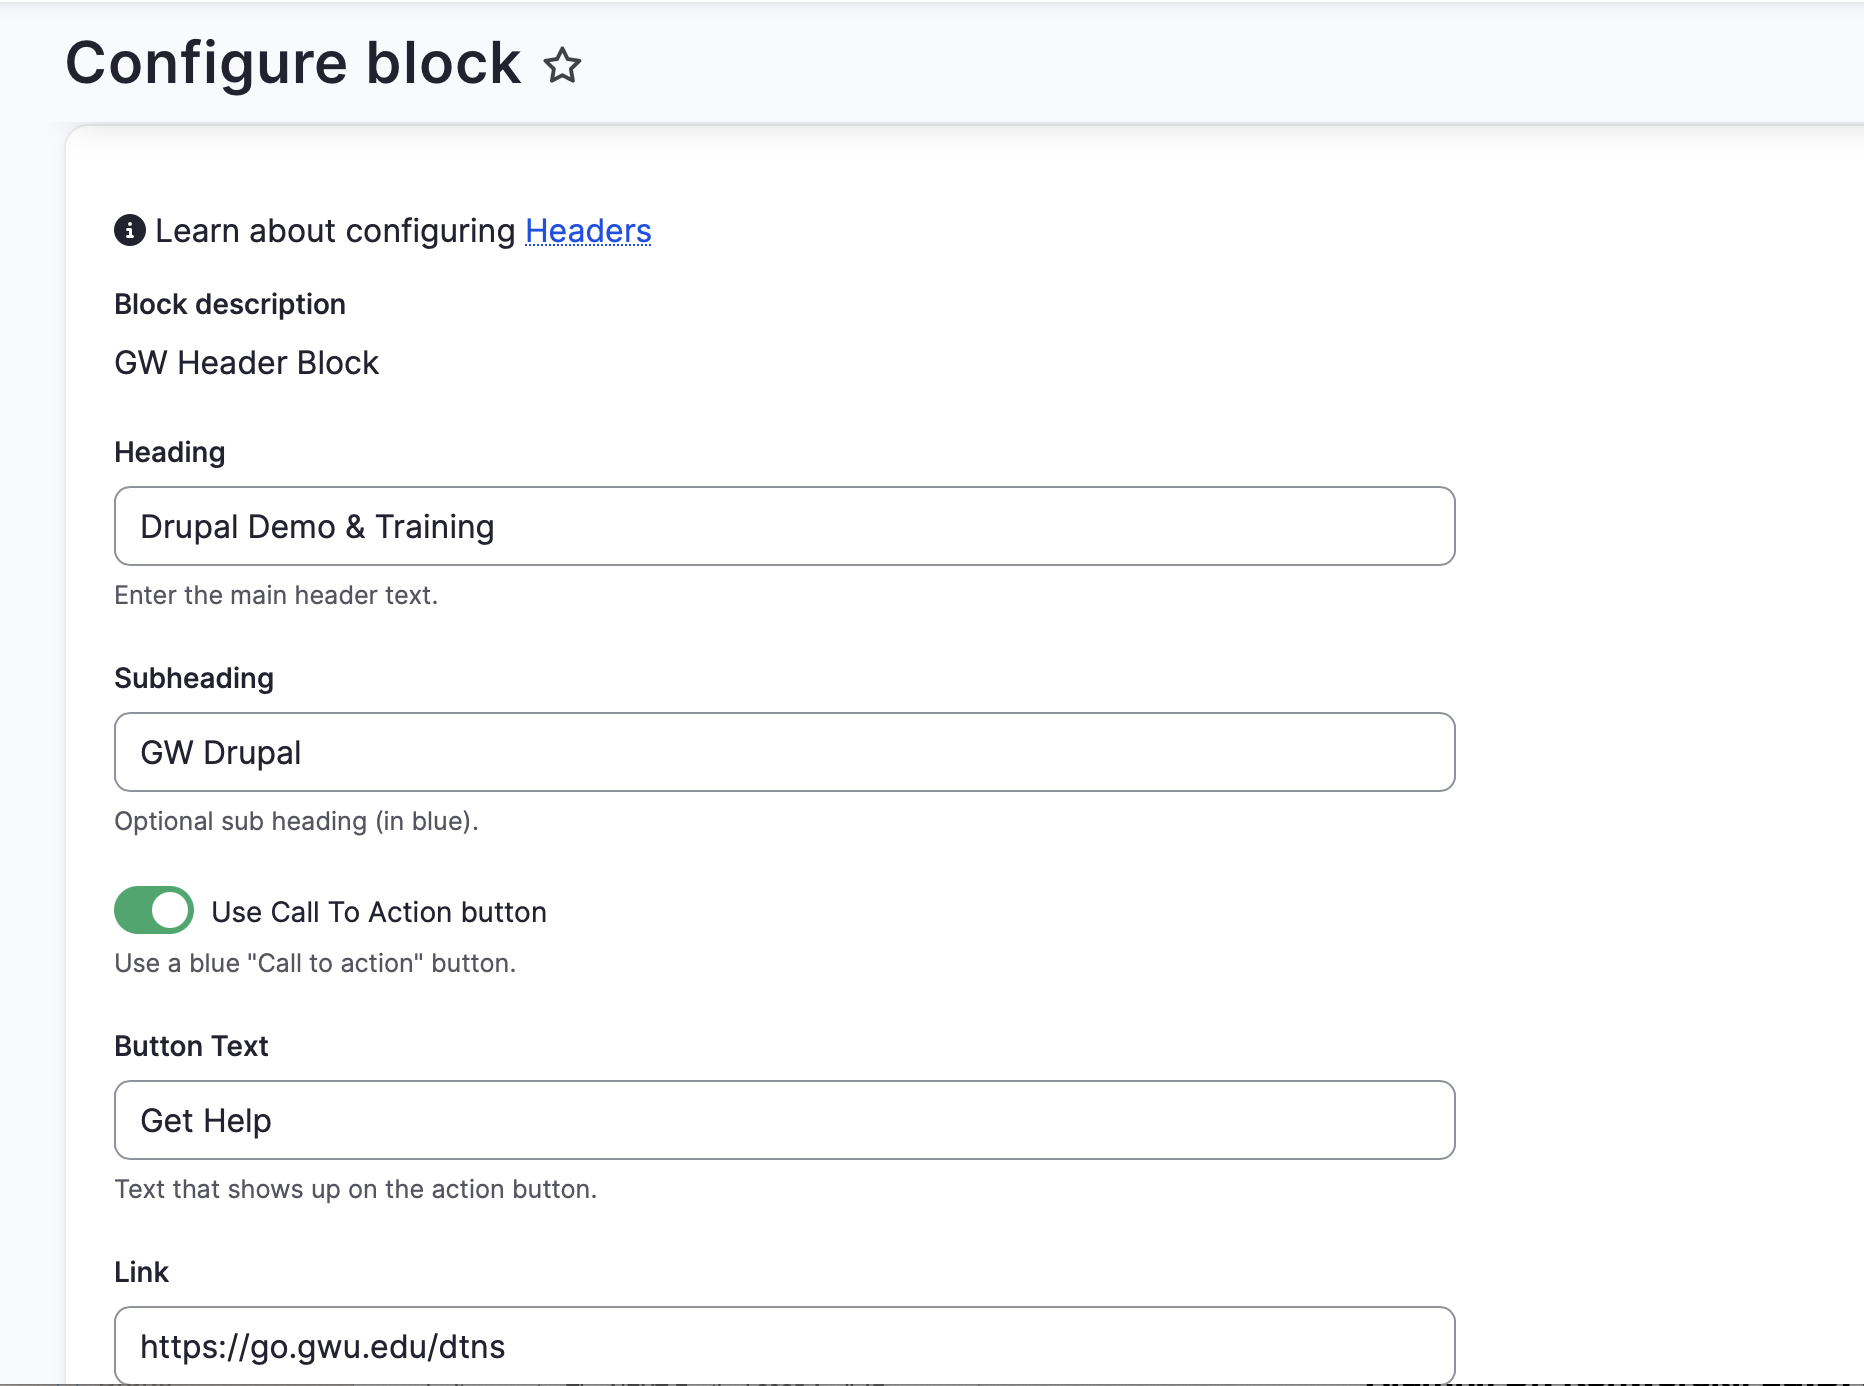
- On the Block Layout page scroll down to the section labeled Header, locate the GW Header Block, and click Configure.
- Use the Heading and optional Subheading fields to update the text displayed on the site's header
- Check the Use Call to Action Button box to add an optional button link to the left side of your header
- Type a short, descriptive action in the Button Text field to display on the button (ex: Apply, Contact Us, All programs)
- Type or paste the destination URL or node ID of the page you want the button to bring users to in the Link field
- Scroll to the bottom of the page and click Save Block

Replacing the GW Monogram Logo
In some cases, a site owner may want to replace the GW monogram logo with a custom logo in the header.
Note: All brand images and official university logos are created by GW Communications & Marketing and are constructed in compliance with the university's Identity Standards & Guidelines.
If you have a customized logo designed for your site by GW Communications & Marketing, you can replace the monogram logo by following these instructions.
- Hover over Structure in the admin menu bar then click on Block Layout
- Note: If you do not see Block Layout under Structure in your menu, you do not have the permission level required to make this kind of update. Contact your site owner for further assistance.
- On the Block Layout page scroll down to the section labeled Header, locate the GW Header Block, and click Configure.
- Scroll down to the checkbox labeled Override Default Image and click the box
- Use the Choose File button to select an image from your computer
- If the image you selected contains text, you may want to remove any text from the Heading and Subheading fields
- Scroll to the bottom of the page and click Save Block
Note: If the custom logo has the text in it, leave the Heading and Subheading fields blank to not display live text next to the logo.


